Configurations
This guide walks you through configurations in HoodEngage - what they are, how to work with them, and how to create a new configuration.
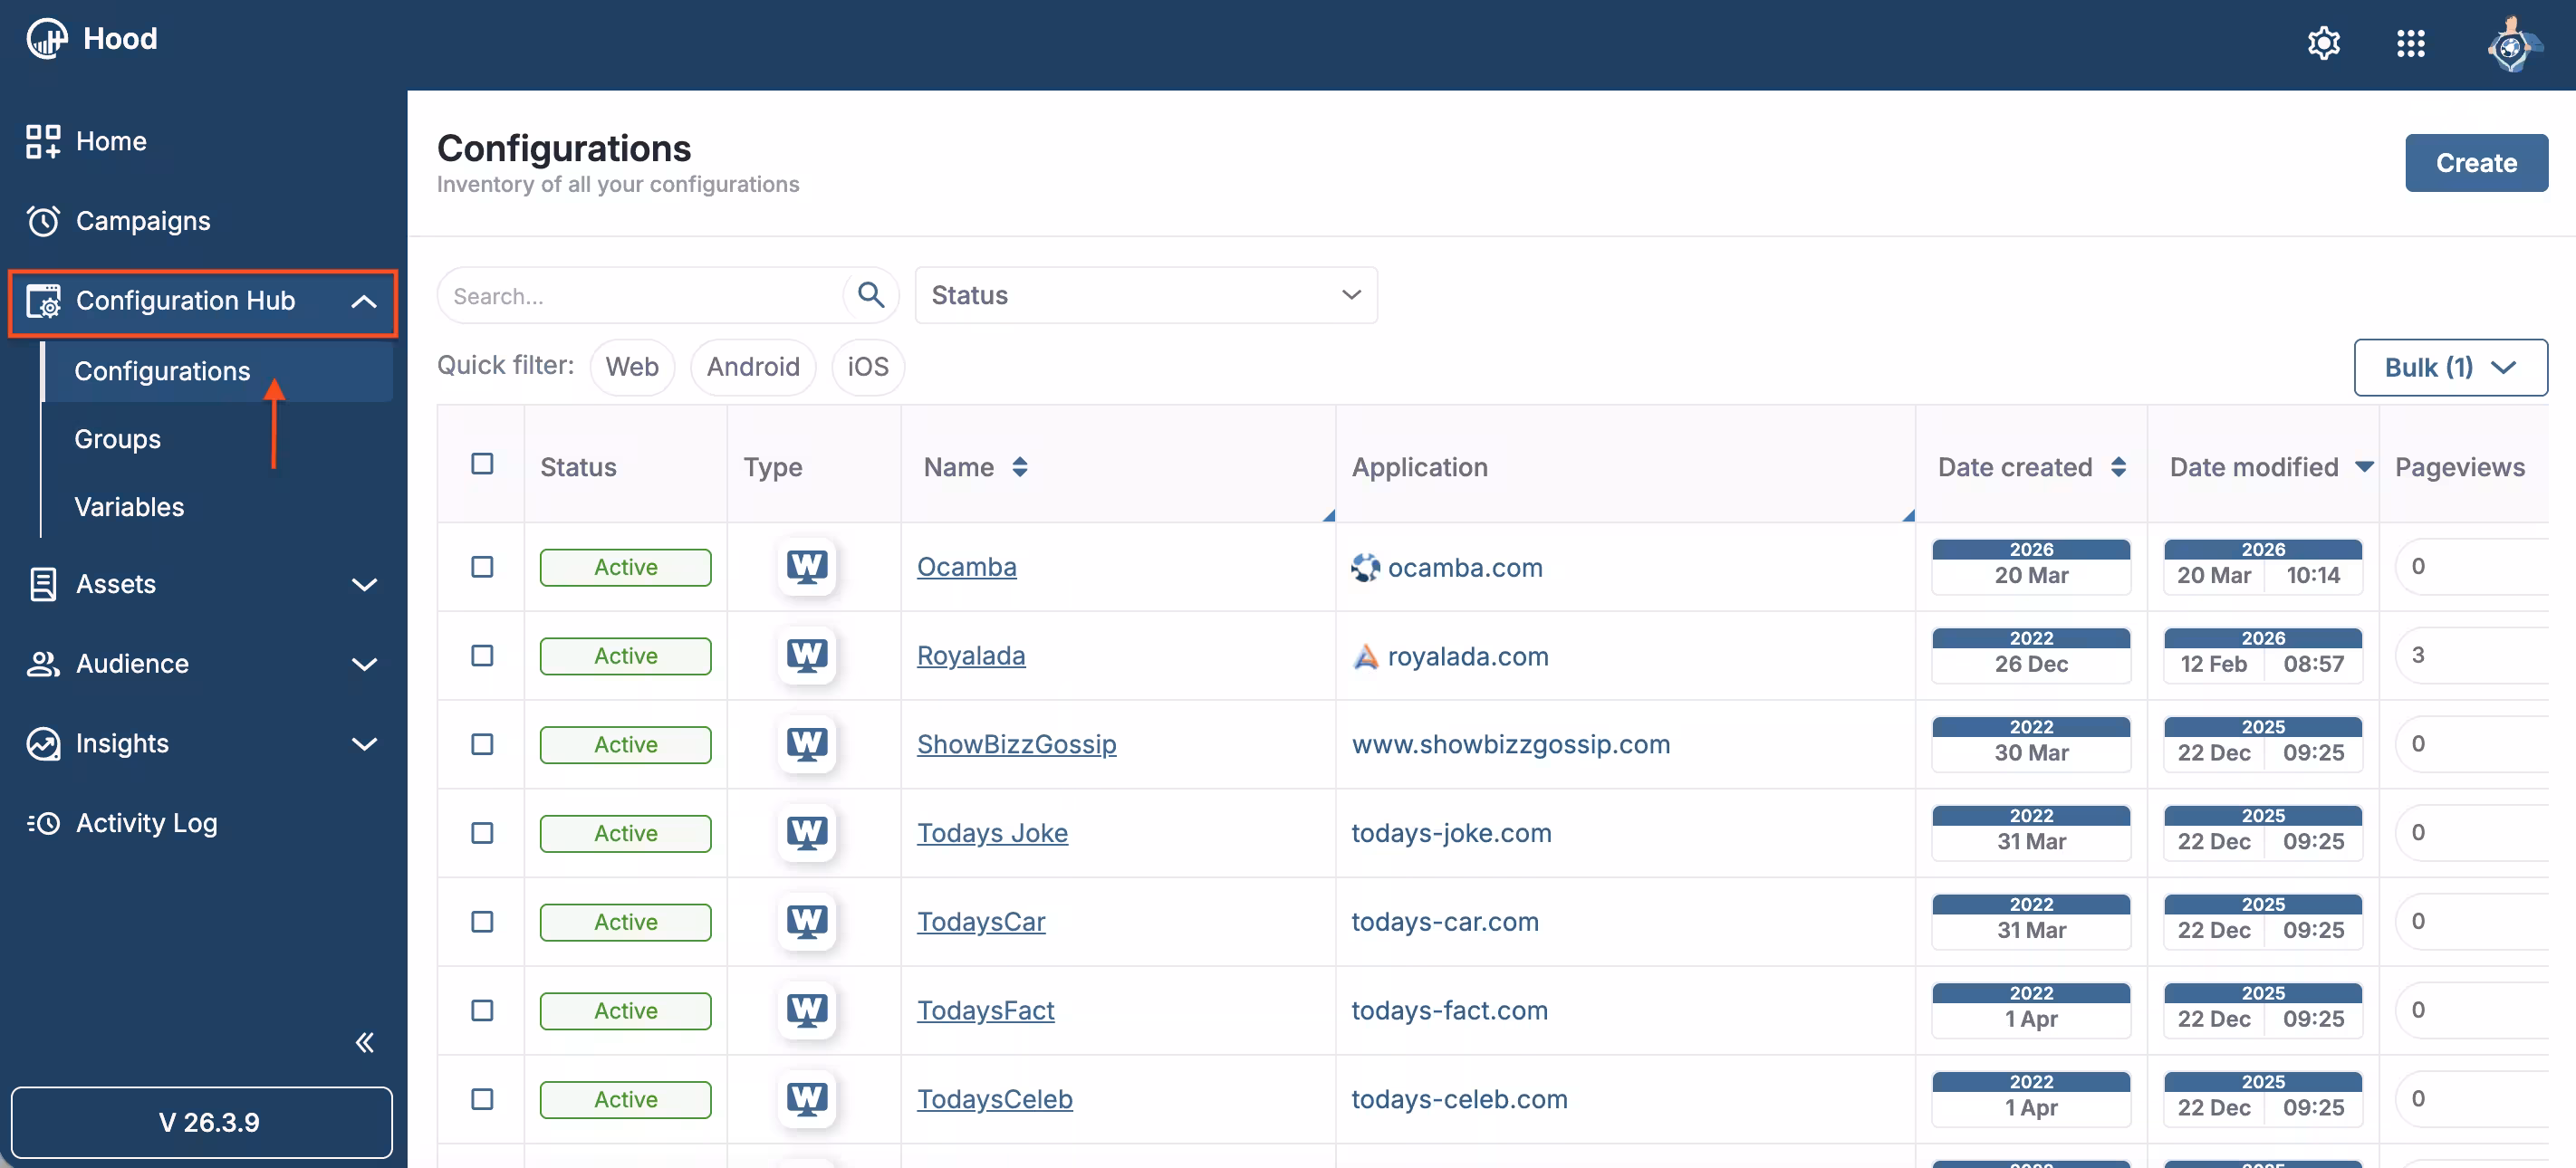
You’ll see how to work with the Configurations inventory - your list of web and app configurations - and how to create or manage them, use search and filters (by status and type: Web, Android, iOS), and understand the table (status, type, name, application, dates, pageviews, sessions).
In the platform, open Configuration Hub in the sidebar.
Configurations overview
Information in the configurations list
In the Configurations inventory you can see and use:
- Status - Active, Paused or Not Installed.
- Type - Web, Android, or iOS.
- Name - configuration name (clickable to open it).
- Application - associated domain or app (e.g. website URL or app package).
- Date created - when the configuration was created.
- Date modified - when it was last changed.
- Pageviews - number of pageviews for that configuration.
- Sessions - number of sessions.
- Profiles - number of profiles for that configuration.
- Push subscriptions - number of push subscriptions.
- Push unsubscriptions - number of push unsubscriptions.
You can also search configurations, filter by Status and by type (Web, Android, iOS), use Bulk actions on selected rows, and Create new configurations from the top of the page.
Creating a configuration
To create a new configuration:
- In the top right corner of the Configurations page, click Create.
- The Add configuration window opens. Choose the platform (Web, Android, or iOS), enter a Configuration name (required), select a Partners value (required), then click Confirm to create the configuration or Cancel to close without saving.
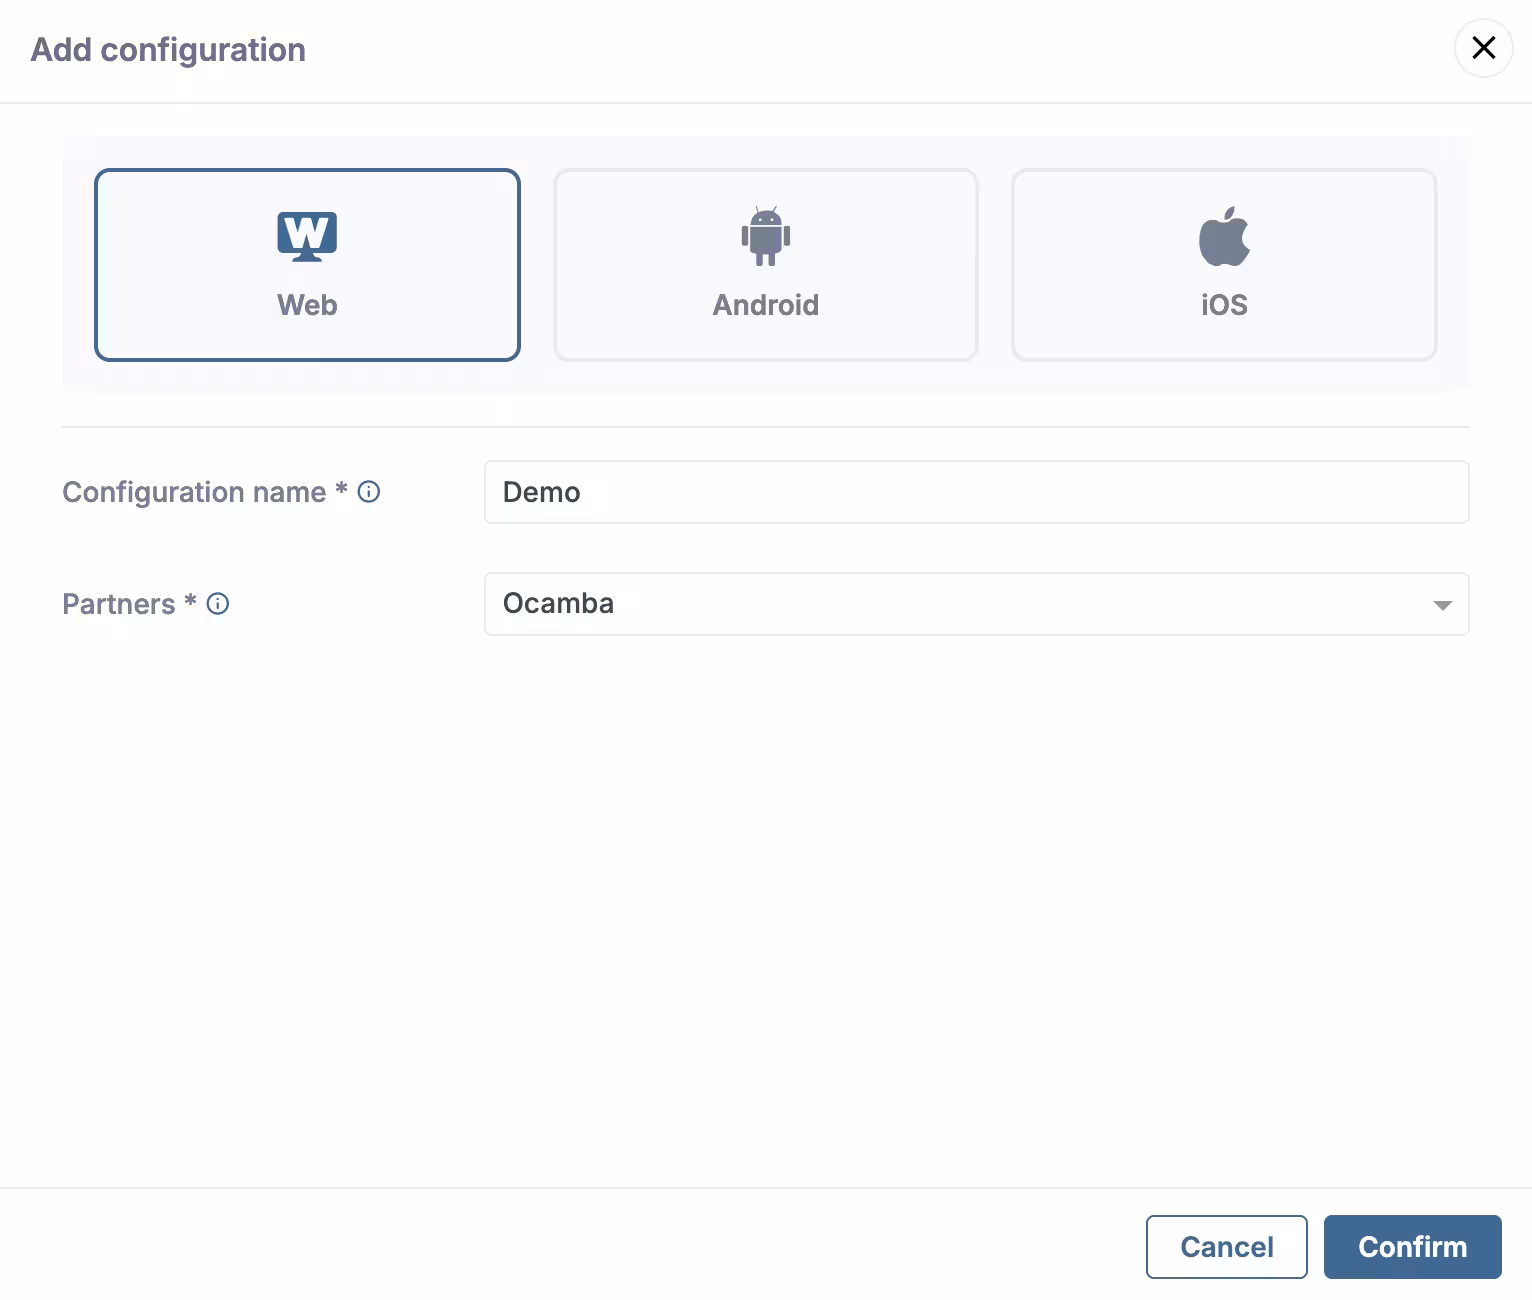
Add configuration
Once your configuration is created, you can set it up and get the integration code from the Instructions tab (under Configuration Hub → open the configuration → Instructions).
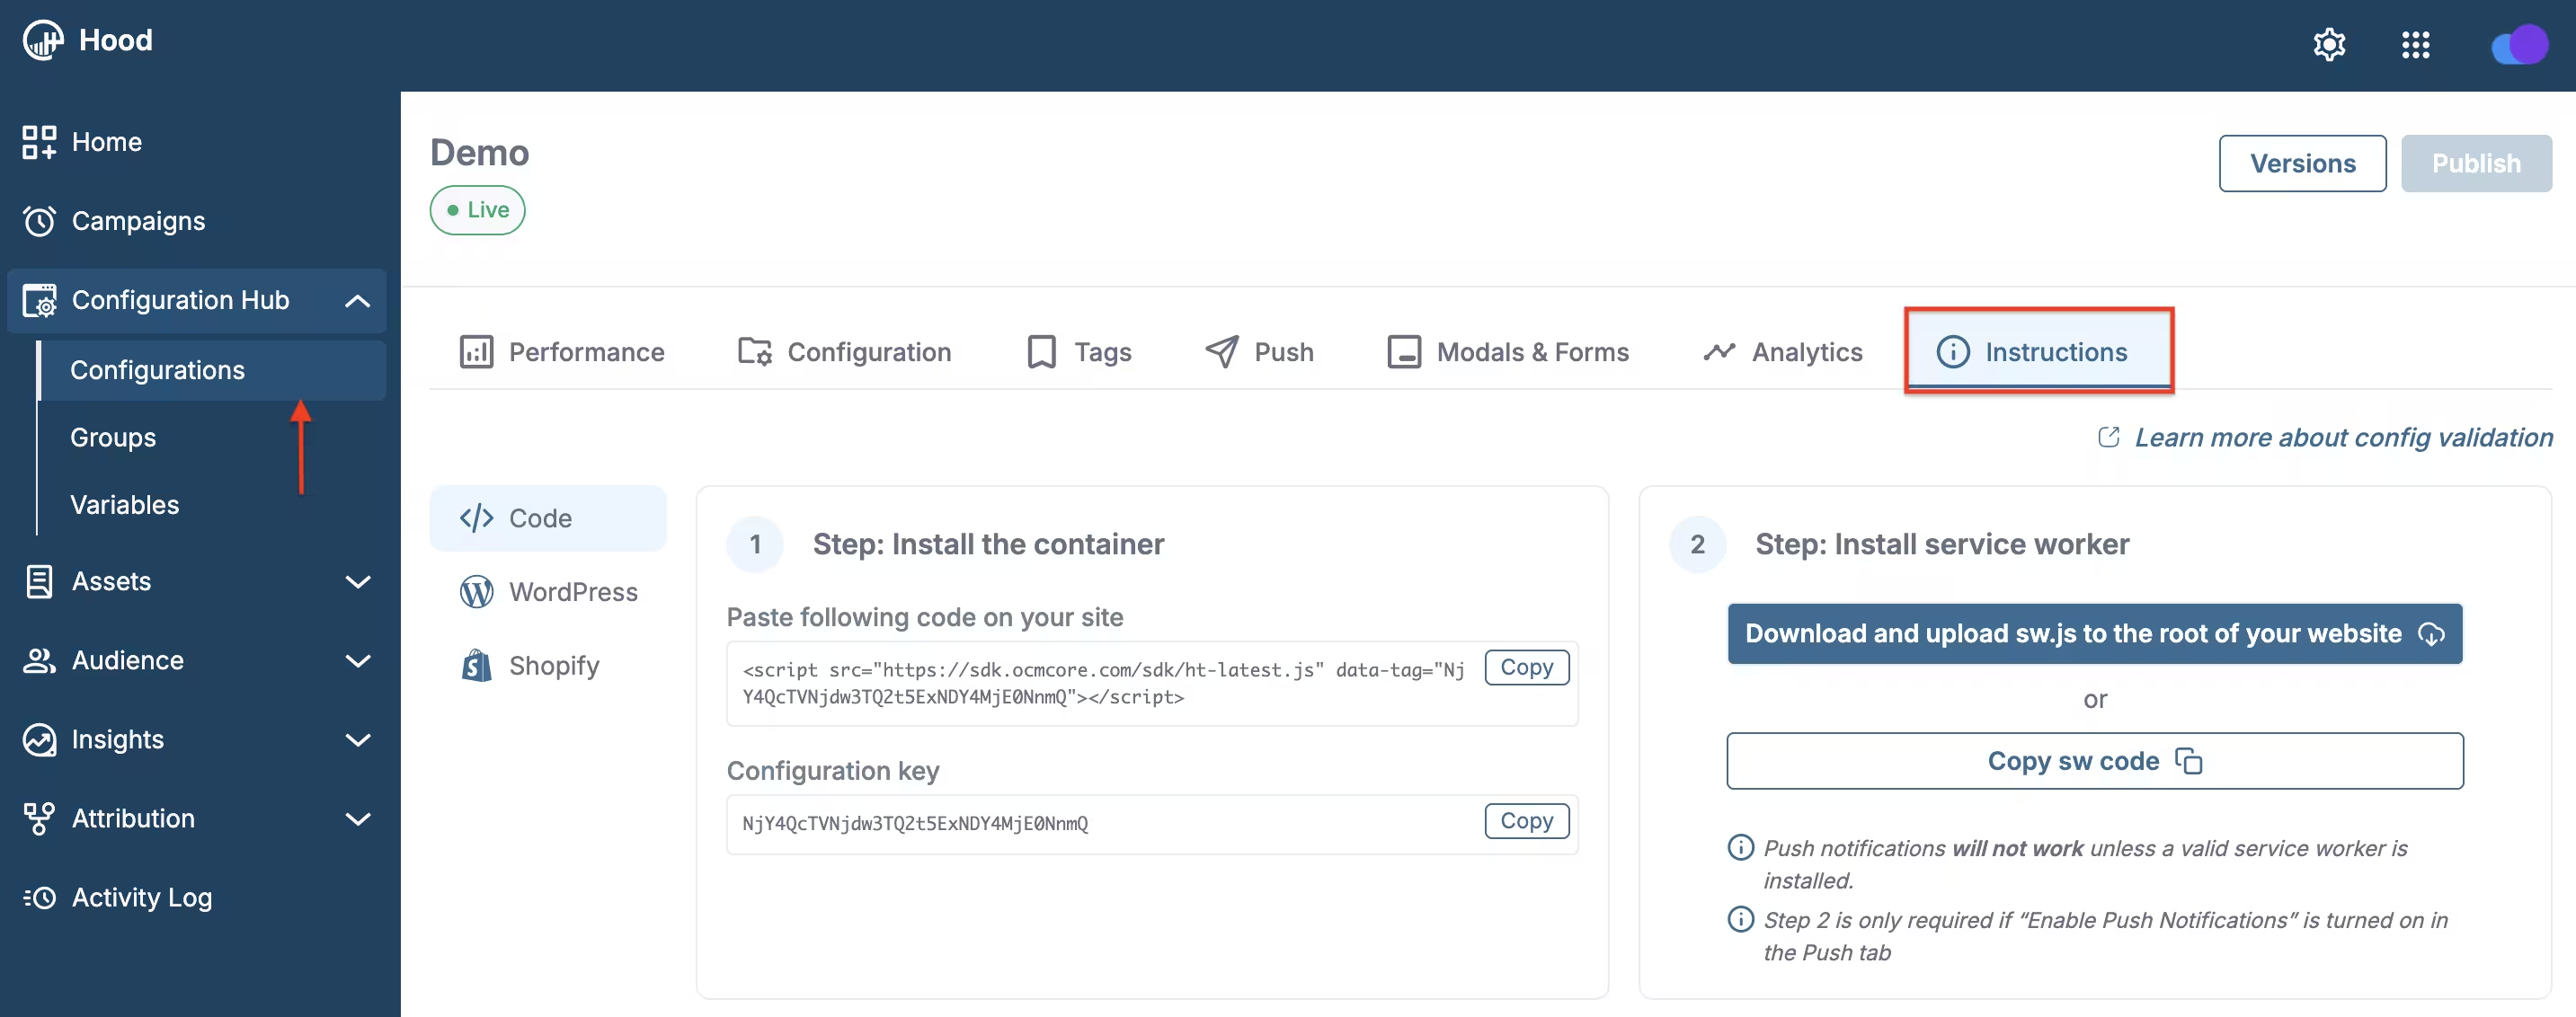
Instructions tab
For the next steps and full instructions - installing the container, service worker, see the dedicated pages: Web SDK instructions, WordPress Push notifications, and Shopify Push notifications.
Configuration tabs
When you open a configuration (by clicking its name in the list), you see several tabs: Performance, Configuration, Tags, Push, Modals & Forms, Analytics, and Instructions. Below is what each tab is for.
Performance
The Performance tab shows key metrics for that configuration over a chosen period. For a detailed explanation of all metrics and examples, see more on the following page: Web SDK instructions - Performance tab.
Configuration
Control Configuration Status with the toggle (e.g. to set the configuration Live or not), and manage which domains can use this configuration. Use Add Domain to add allowed domains. By default, your tag works on any domain where it is installed; for better security and control, we recommend adding the domains you use - once added, events from other domains are ignored.
Tags
In the Tags tab you create and manage tags for this configuration. For a detailed guide to creating tags, choosing types, and configuring triggers and conditions, see more on the following page: Web SDK instructions - Tags tab.
Push
In the Push tab you configure push notification behaviour for this configuration. For a detailed guide to settings, prompts, and best practices, see more on the following page: Web SDK instructions - Push tab.
Modals & Forms
In the Modals & Forms tab you manage modals and forms for this configuration. For a detailed guide to creating, ordering, and configuring modals, see more on the following page: Web SDK instructions - Modals & Forms tab.
Analytics
In the Analytics tab you turn analytics-related features on or off for this configuration. For a detailed explanation of Analytics, Consent, and Crashlytics, including examples, see more on the following page: Web SDK instructions - Analytics tab.
Instructions
Integration steps and code (container, service worker). See also Web SDK instructions, WordPress Push notifications, and Shopify Push notifications.
Publishing changes
Changes in Configurations take effect only after you publish them, or if automatic publishing is enabled in Settings. To publish manually: use the Publish button in the upper right corner and enter a version (e.g. a version number or short description).

Publish button and version
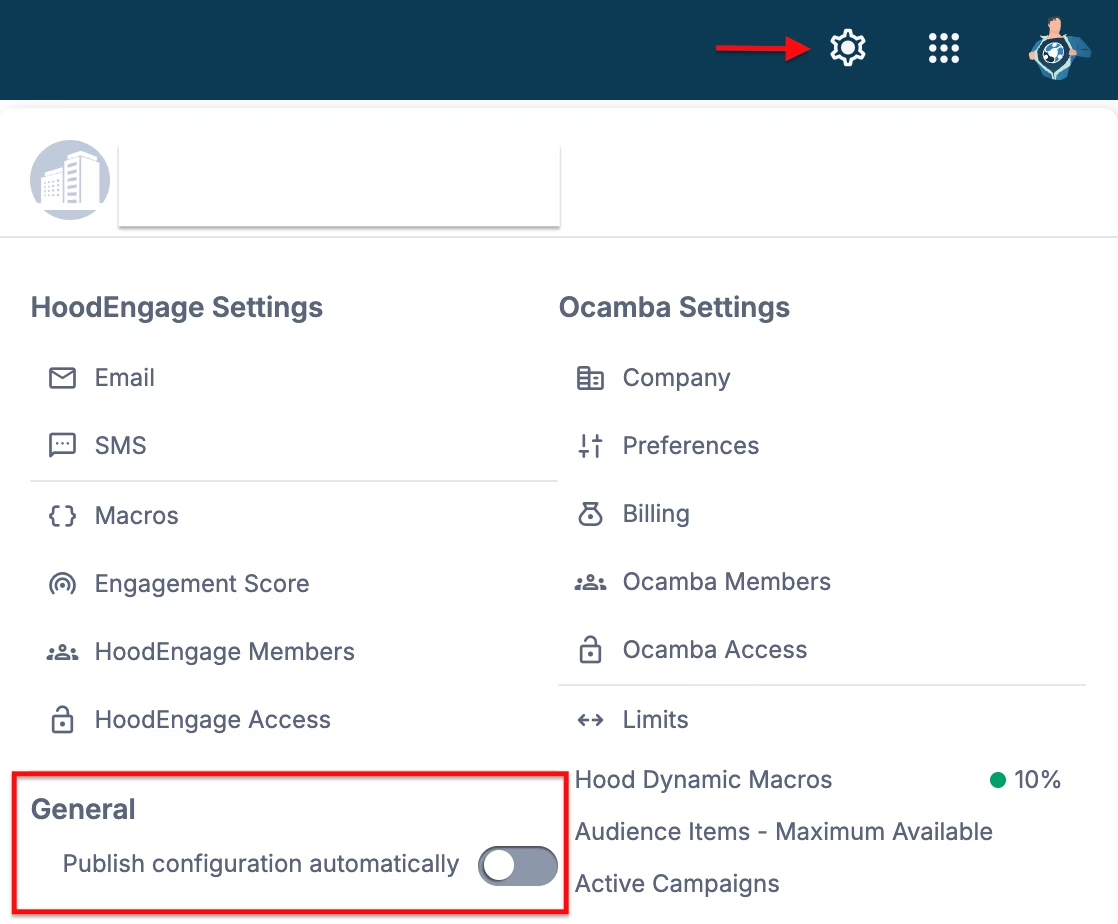
Publish configuration or set automatic publishing in Settings