NPS Surveys
NPS (Net Promoter Score) Surveys are specialized modals designed to measure customer satisfaction and loyalty. They allow you to collect NPS scores from your users: on web platforms, the scale is 0-10, while on mobile applications, the scale is 0-5. You can also collect optional comments and feedback along with the scores.
Key features of NPS Surveys:
- Score collection — Capture NPS scores (0-10 on web, 0-5 on mobile) to measure customer satisfaction
- Feedback gathering — Collect detailed comments and feedback from users
- Customer segmentation — Automatically categorize users as Promoters, Passives, or Detractors (on web: Promoters 9-10, Passives 7-8, Detractors 0-6; on mobile: Promoters 4-5, Passives 3, Detractors 0-2)
- Real-time analytics — View collected data and customer scores in Insights → Feedback
- Performance tracking — Monitor promoter, passive, and detractor trends via reporting endpoints
Step-by-step guide: Creating your NPS survey
Follow this complete guide to create, customize, and track your NPS modal from start to finish.
Step 1: Create your NPS modal
- Navigate to Sites setup in the HoodEngage dashboard
- Go to the Modals & Forms tab
- Click Add Modal
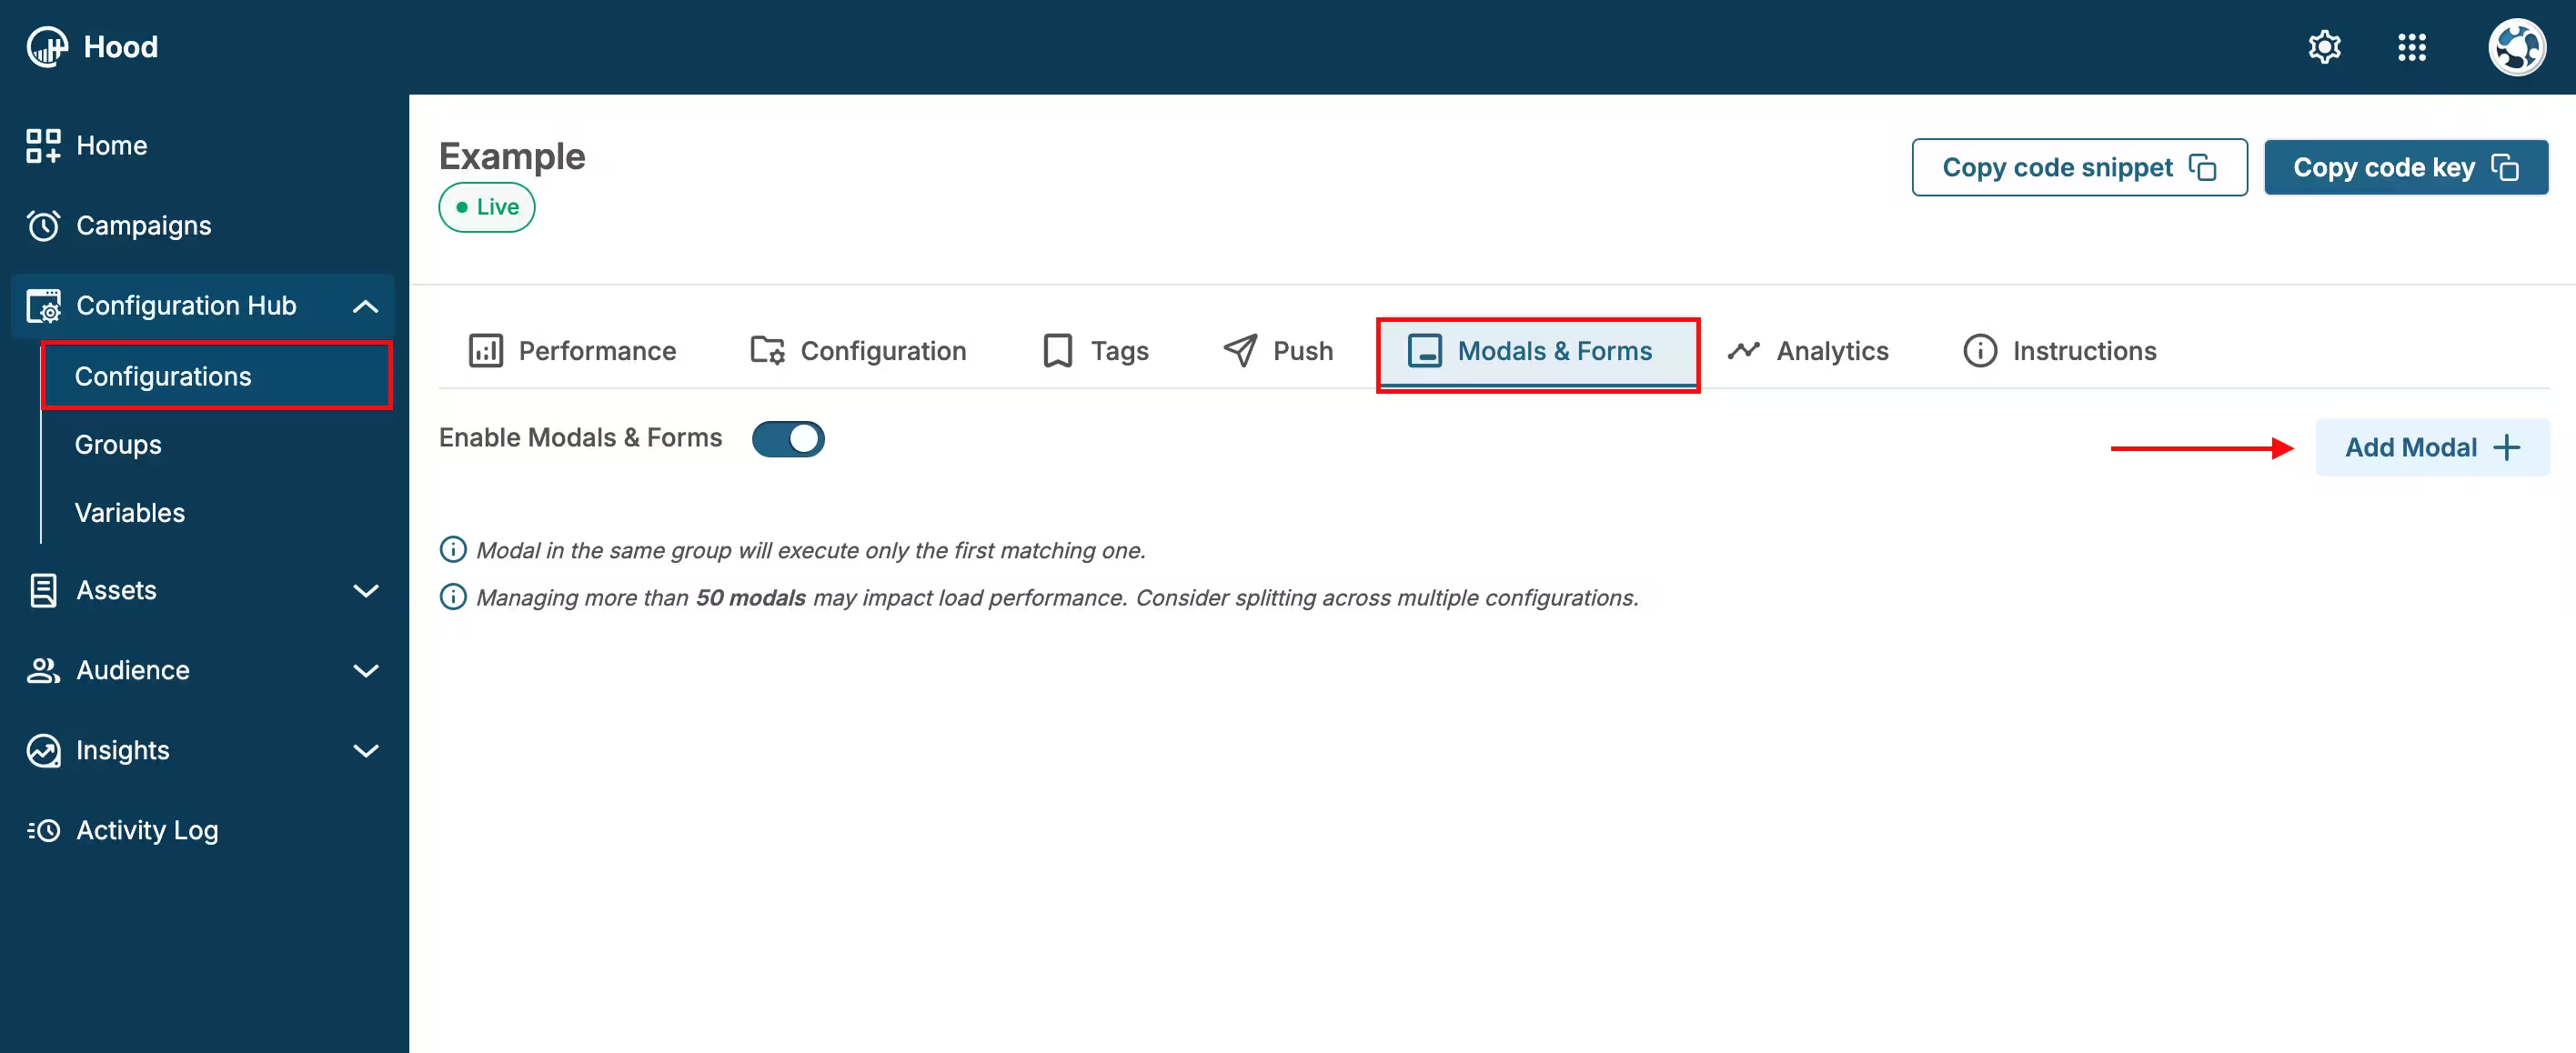
Add Modal
- Choose to either:
- Create Template — Build a custom NPS Survey. When you select “Create Template”, Studio will open. Within Studio, select the NPS element, which you can then style and configure.
- Use an existing template — Select from templates if you have previously created them
Step 2: Configure content and design
- Set your question text — Enter the NPS question (e.g., “How likely are you to recommend us to a friend or colleague?”)
- Customize the design:
- Choose colors that match your brand
- Add your logo or branding elements
- Adjust font sizes and styles
- Configure the scale display (0-10 for web, 0-5 for mobile)
- Configure NPS settings:
- Display Type — Choose how the rating scale will be displayed: Numbers, Stars, or Emoji
- Number of Items — Set the number of points on the rating scale (11 for 0-10 scale on web, 6 for 0-5 scale on mobile)
- Scale Labels — Customize the labels for the lowest and highest points on the scale (e.g., “Unlikely” and “Likely”)
- Show Feedback Textarea — Enable or disable the optional text area for additional feedback
- Question Mode — Configure additional question behavior settings
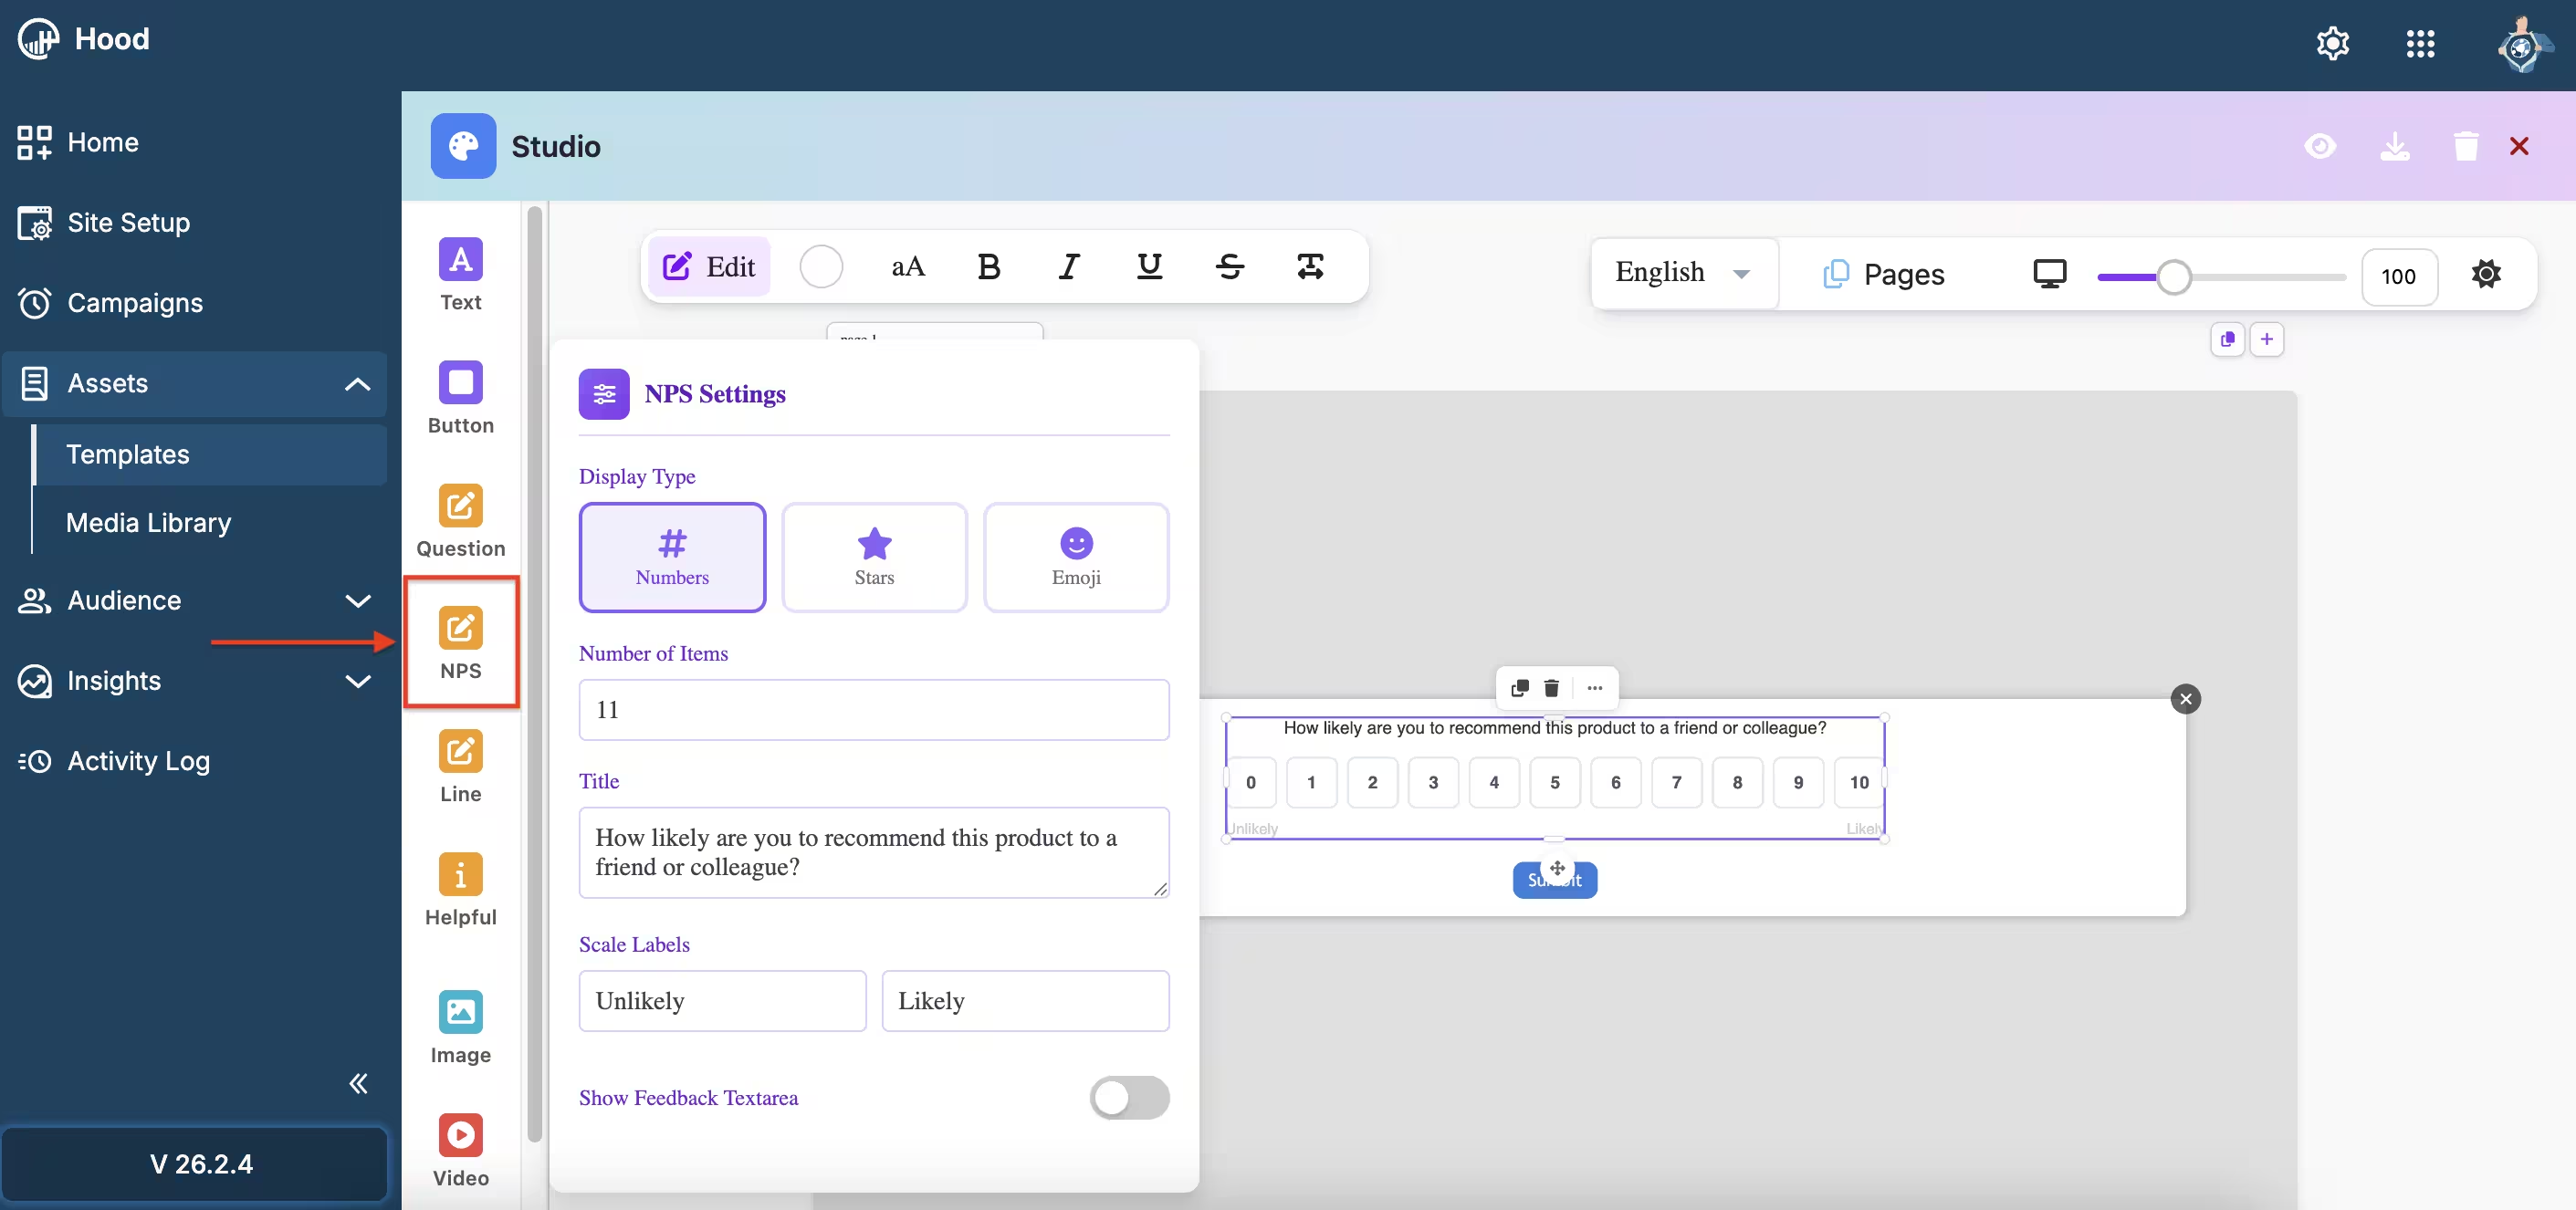
NPS Settings in Studio
- Enable optional comments — Allow users to provide additional feedback along with their score
- Preview your modal — Use the preview feature to see how it will appear to users

NPS Modal example
Step 3: Set up triggers and display conditions
Configure when and where your NPS Survey should appear. For detailed information about all available activation triggers and render conditions, see Triggers, Conditions, Frequency & Limits.
Step 4: Configure frequency and limits
Set how often your NPS Survey should be displayed to users. For detailed information about frequency options and limits, see Triggers, Conditions, Frequency & Limits.
Step 5: Activate and test
- Save your modal — Click Save to store your configuration
- Assign to configuration — Ensure the modal is assigned to the correct configuration
- Test the modal:
- Visit your website
- Trigger the modal based on your settings
- Verify the display, scoring, and submission process
- Test on both desktop and mobile devices
Step 6: Monitor feedback and analytics
Once your NPS modal is live, track its performance:
- View Quick View metrics:
- Navigate to Insights → Feedback
- Find your NPS modal in the list
- View key metrics: Average NPS, Views, Responses, Promoters/Passives/Detractors
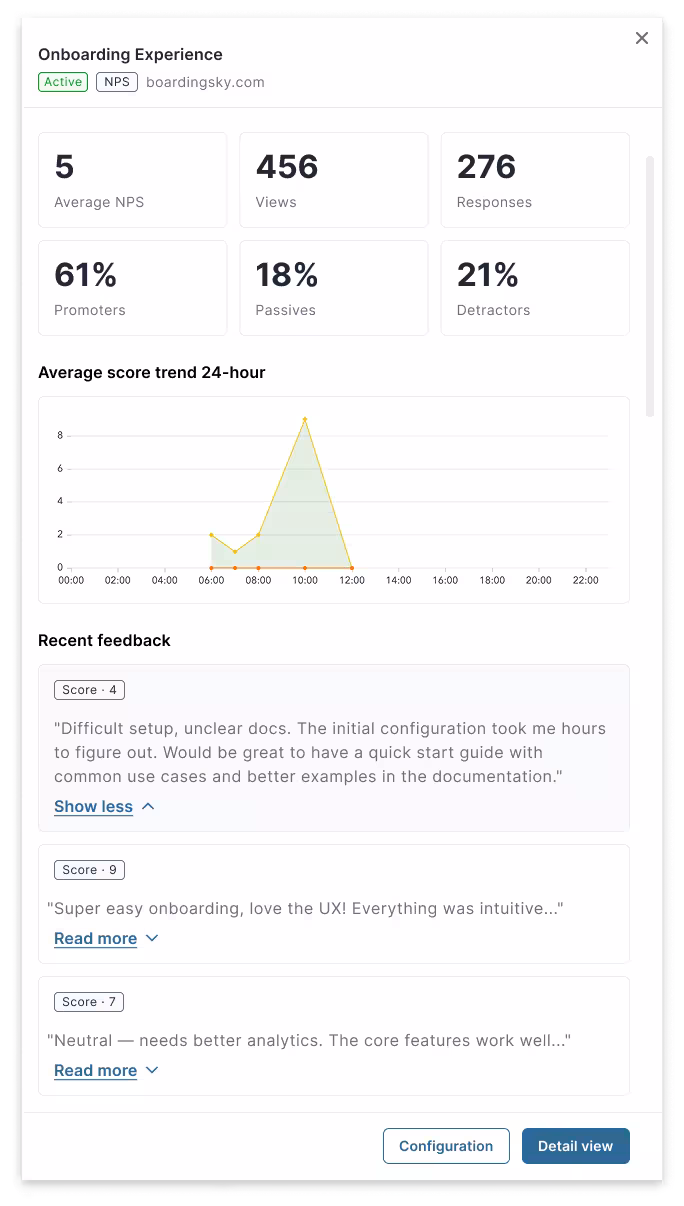
NPS Quick View
- Access Detail View:
- Click “Detail view” for comprehensive analytics
- Review response rates, completion rates, and bounce rates
- Analyze trends over time with visual charts
- Filter by date ranges and score ranges
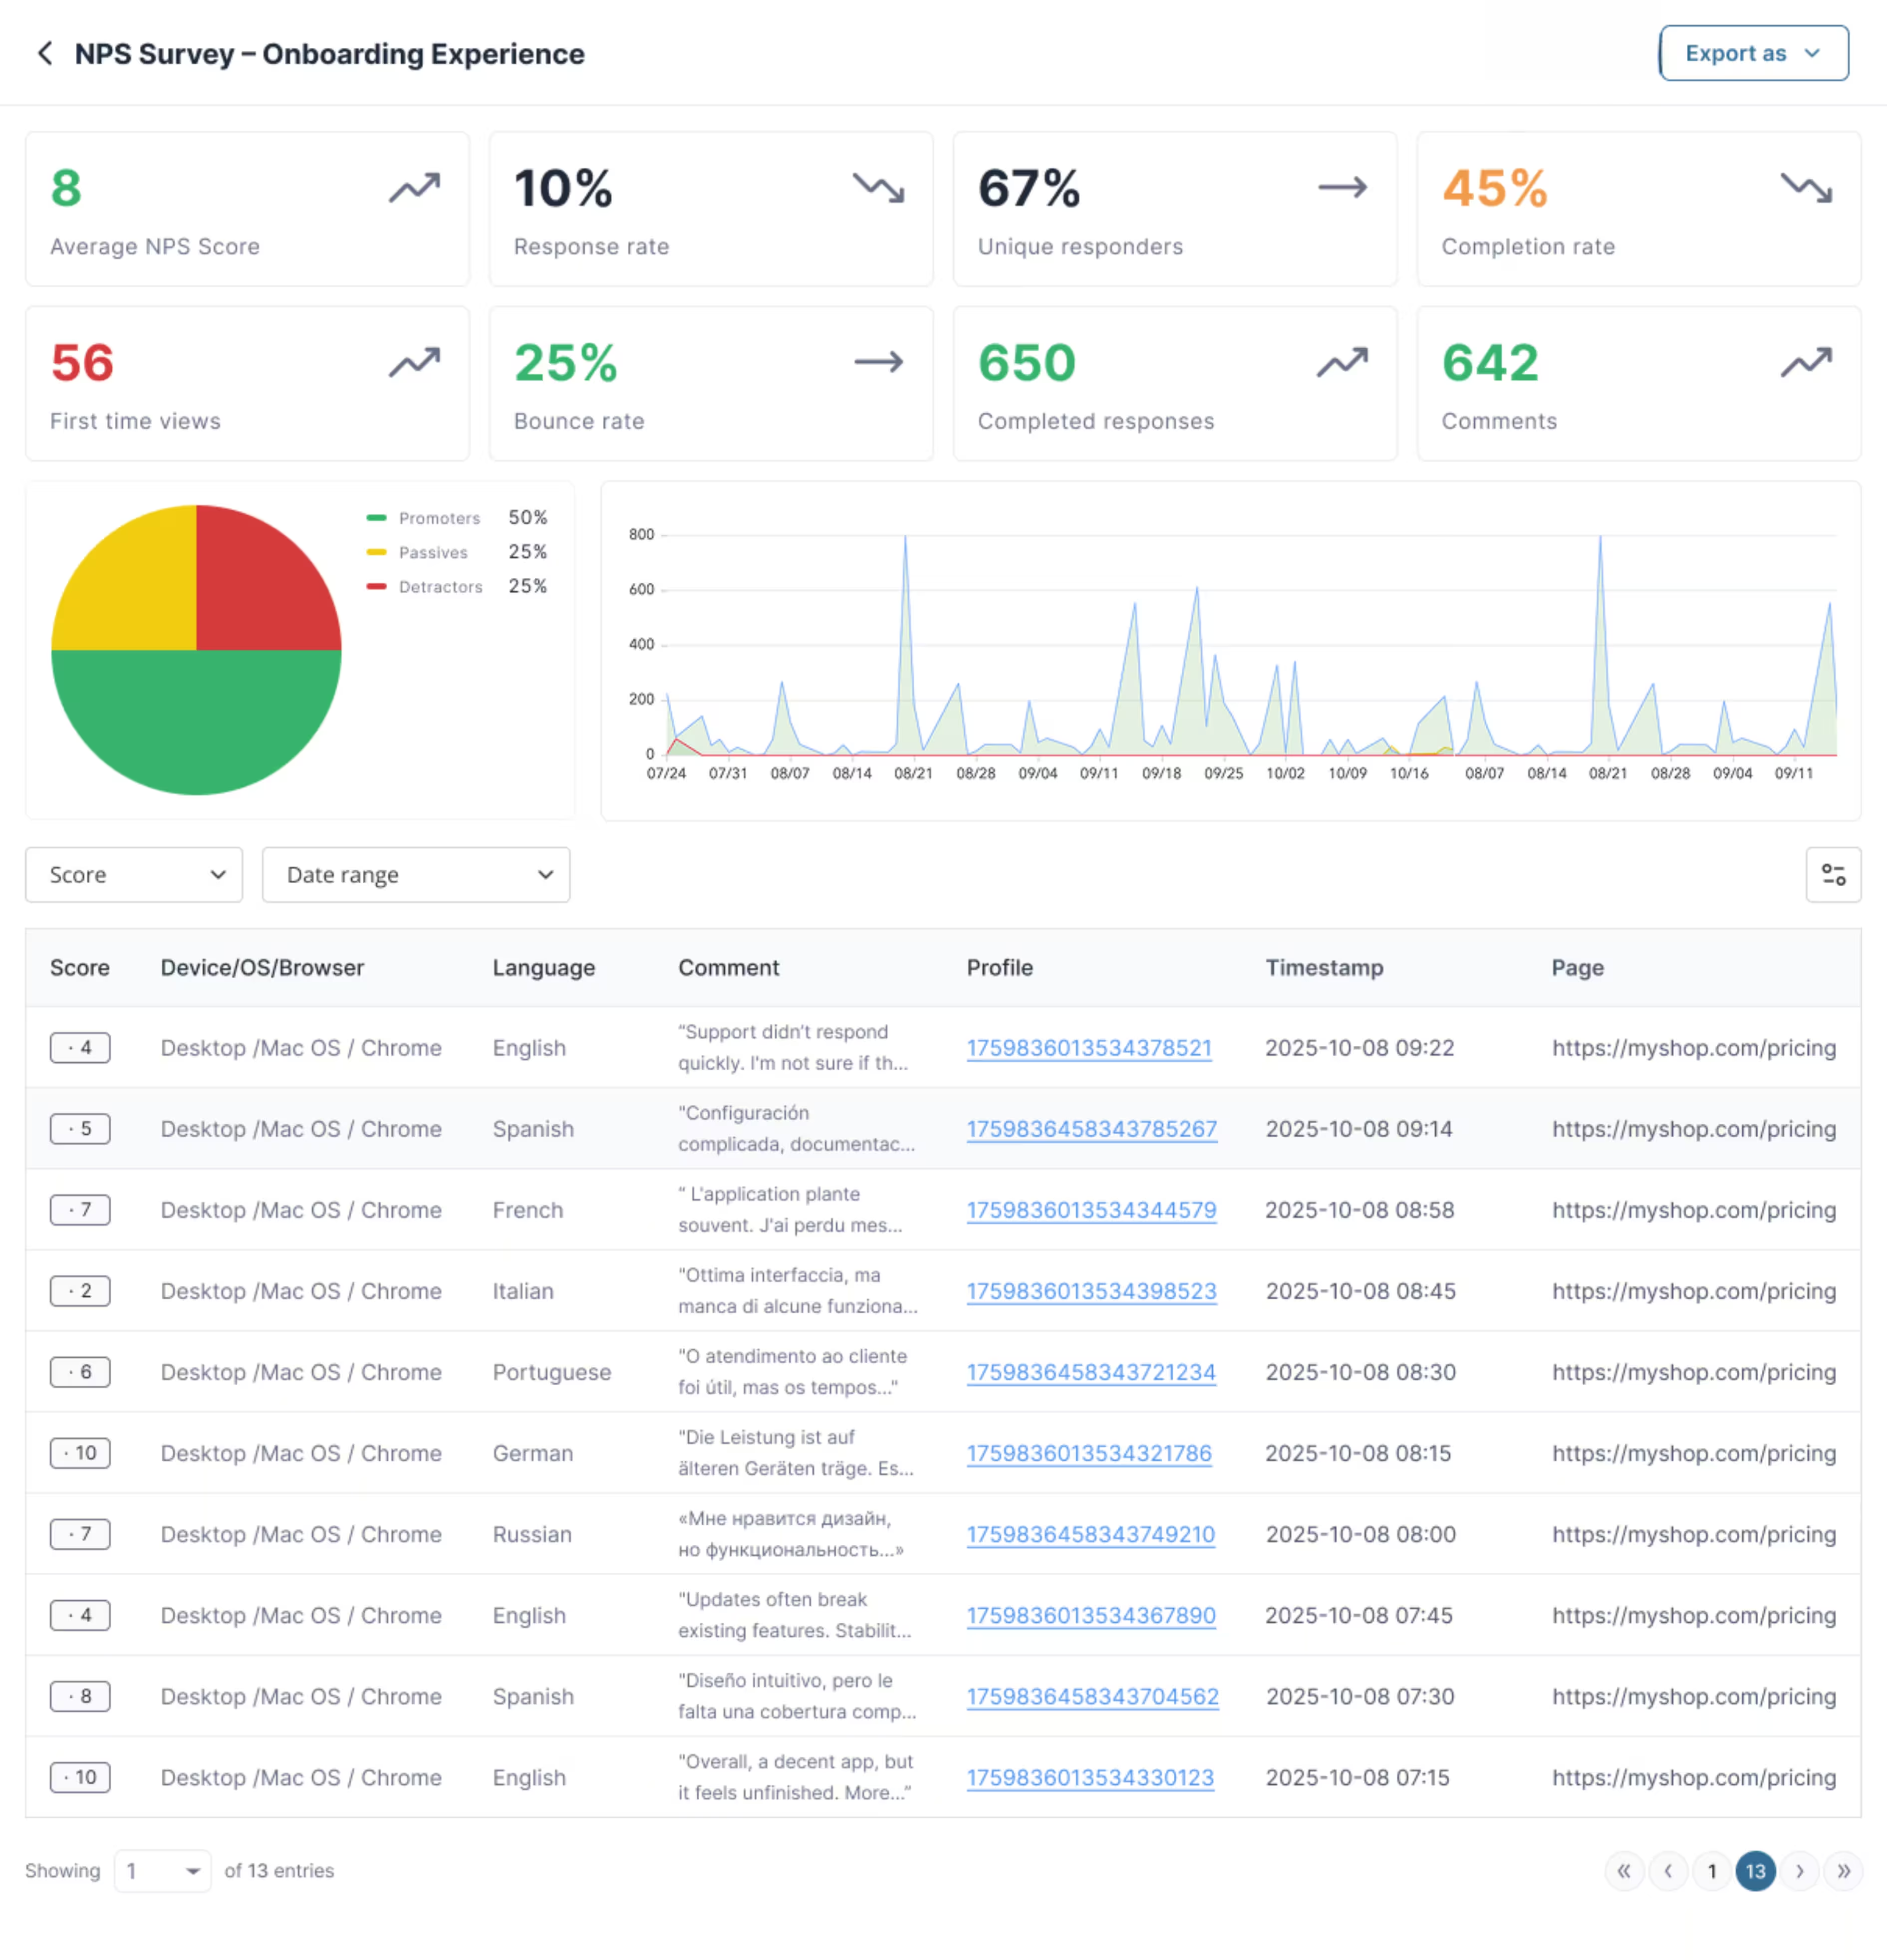
NPS Detail View
Export data:
- Export responses in CSV or JSON format
- All exported files are available in Insights → Exports
- Download for further analysis in external tools
- Access individual user responses and comments
Access pre-defined reports:
- Navigate to Insights → Reports
- Find pre-defined reports specifically designed for NPS modals
- These reports provide comprehensive analytics and insights about your NPS survey performance
- Available reports include:
- NPS Performance Overview — Overall performance summary
- NPS Trend over time — Track changes in customer satisfaction
Value for users
When users interact with your NPS modal, they receive:
- Voice in product development — Their feedback directly influences product improvements and feature development
- Improved experience — Their input helps shape a better user experience tailored to their needs
- Recognition — Their opinions are valued and contribute to the product’s evolution
- Transparency — They can see how their feedback is being used to improve the service
Best practices
- Timing matters — Show NPS surveys after users have had a meaningful interaction with your product or service
- Keep it simple — Use clear, concise questions
- Follow up — Review feedback regularly and act on insights
- Segment results — Use render conditions to target specific user groups for more relevant insights
- Respect user experience — Don’t show surveys too frequently or at inappropriate times
For NPS Surveys, you can track promoter, passive, and detractor trends, and analyze customer satisfaction over time.