Push permissions prompts
Push permissions prompts are modal windows that appear to allow users to set up notification categories. In the first prompt, users can select from various categories such as sports, politics, news, and more, which they can configure to receive relevant push notifications.
Key features of Push permissions prompts:
- Category selection — Allow users to choose from predefined categories (e.g., sports, politics, news, entertainment, etc.)
- Customizable categories — Configure which categories are available for users to select
- Notification preferences — Users can set their preferences for which types of content they want to receive
- User control — Give users control over the types of notifications they receive
- Improved engagement — Send more relevant notifications based on user-selected categories
- Better user experience — Users only receive notifications for topics they’re interested in
Common use cases for Push permissions prompts:
- News websites — Let users select news categories (politics, sports, technology, etc.)
- Content platforms — Allow users to choose content categories they want to follow
- E-commerce — Enable users to select product categories for promotional notifications
- Media outlets — Let users choose topics of interest (entertainment, lifestyle, etc.)
- Blog platforms — Allow users to subscribe to specific blog categories
Step-by-step guide: Creating your Push permissions prompt
Follow this complete guide to create, customize, and configure your Push permissions prompt from start to finish.
Step 1: Create your Push permissions prompt
- Navigate to Sites setup in the HoodEngage dashboard
- Go to the Push tab
- Click Add Push Prompt
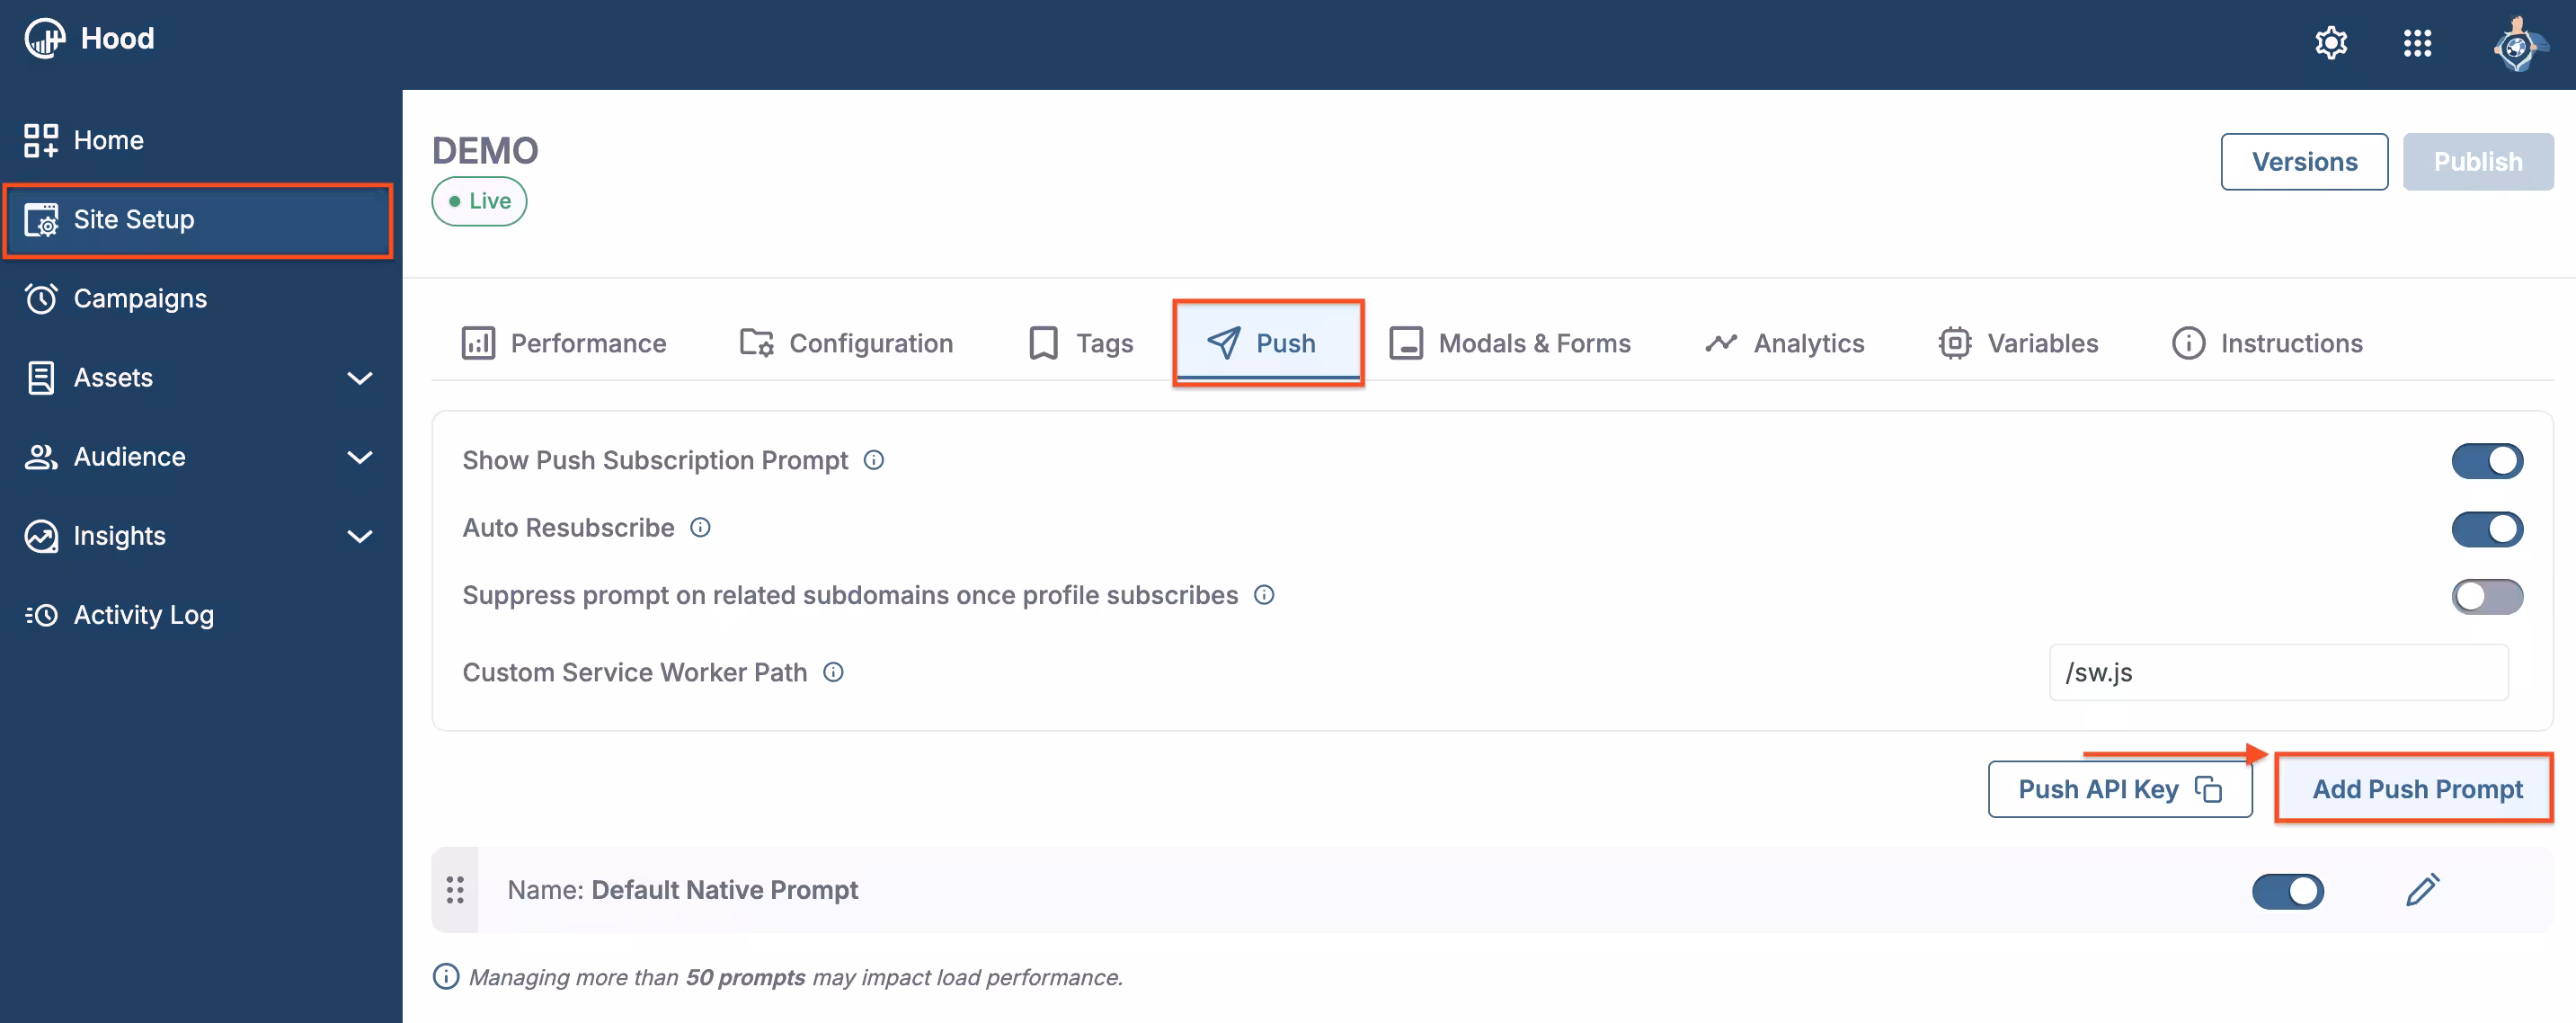
Add Push prompt
- Choose to either:
- Create Template — Build a custom permission prompt. When you select “Create Template”, Studio will open. Within Studio, you can add text, images, buttons, and other elements to design your push permissions prompt.
- Use an existing template — Select from templates if you have previously created them
Step 2: Configure categories and content
Set up categories:
- Define the categories users can select (e.g., Sports, Politics, News, Entertainment, Technology, etc.)
- Configure category names and descriptions
Customize the prompt message:
- Enter a clear message explaining why users should enable notifications
- Explain the benefit of selecting categories (e.g., “Choose your interests to receive personalized updates”)
- Add your branding elements
Configure the design:
- Choose colors, fonts, and styling that match your brand
- Add your logo or branding elements
- Ensure the category selection interface is clear and easy to use
- Make it mobile-friendly
Preview your prompt — Use the preview feature to see how it will appear to users
Step 3: Set up triggers and display conditions
Configure when and where your Push permissions prompt should appear. For detailed information about all available activation triggers and render conditions, see Triggers, Conditions, Frequency & Limits.
Best practices for Push permissions prompts:
- Show the prompt after users have engaged with your content
- Use Click Element trigger for better user experience (browser requirement)
- Only show if push notification permission hasn’t been granted yet
- Target engaged users who have shown interest in your content
Step 4: Configure frequency and limits
Set how often your Push permissions prompt should be displayed to users. For detailed information about frequency options and limits, see Triggers, Conditions, Frequency & Limits.
Recommended settings:
- Show once per session or once per day
- Stop showing after user grants or denies permission
- Set appropriate delays between prompts
Step 5: Activate and test
- Save your prompt — Click Save to store your configuration
- Assign to configuration — Ensure the prompt is assigned to the correct configuration
- Test the prompt:
- Visit your website
- Trigger the prompt based on your settings
- Verify the category selection interface works correctly
- Test on different browsers and devices
- Ensure user selections are saved properly
Step 6: Monitor permission acceptance and category preferences
Once your Push permissions prompt is live, track its performance:
View permission metrics:
- Navigate to Insights → Feedback
- Find your Push permissions prompt in the list
- View metrics
Analyze category preferences:
- Review which categories users select most frequently
- Identify popular vs. less popular categories
- Use insights to optimize your category offerings
Optimize based on results:
- Adjust category names or descriptions based on user behavior
- Test different messaging to improve acceptance rates
- Refine category selection based on user preferences
Value for users
Push permissions prompts provide several benefits to users:
- Personalized notifications — Users receive notifications only for topics they’re interested in.
- Control over content — Users can choose exactly what types of updates they want to receive.
- Better experience — Relevant notifications improve user engagement and satisfaction.
- Reduced noise — Users avoid receiving notifications for topics they don’t care about.
- Easy management — Simple interface to select and manage notification preferences.
Best practices
- Clear messaging — Explain why users should enable notifications and select categories
- Relevant categories — Offer categories that match your content and user interests
- Not too many options — Don’t overwhelm users with too many categories. Keep it focused
- Timing matters — Show the prompt after users have engaged with your content
- User gesture required — Ensure the prompt is triggered by a user action (click, scroll, etc.)
- Respect user choice — Don’t repeatedly ask if users have denied permission
- Test category selection — Ensure the category selection interface works smoothly
- Follow browser guidelines — Ensure compliance with browser requirements for push notifications